25 Ideas to Get Your Child Ready to Write
In the spirit of my "Help! My child doesn't like books -- 25 ideas to get your little one to love reading" blog post, I thought it'd be great to share some ideas for promoting WRITING as well.
Luke, who just turned 4 this month, doesn't like to practice writing his letters very much, but that doesn't mean I don't have him preparing like crazy anyway -- and much of it he thinks is just us having fun! (I guess I'll be caught in a few years if he ever goes back and reads my blog! LOL)
You can start preparing your child for writing as soon as they can hold a crayon--around a year old. Simply start by showing them how to make marks on a paper and go from there!
Here are some ideas I use already or plan to use with L&L (2-4yo) for promoting writing: (in random order)
1. Practice fine motor skills as much as possible. These activities help to strengthen hand muscles and develop coordination and control which will help with pencil grip when it's time to write! Start these as early as possible!!! Here is a post I wrote which has lots of fine motor practice ideas.
2. Make a sand or salt box. "Write" or make designs in it using a finger or some sort of utensil (a chopstick, a cotton swab, an unsharpened pencil). This is also a good way to begin letter formation practice. Gently shake the container from side to side to erase. I made some using salt and $1 tins from Michael's. You could also do sand or salt on a tray or cookie sheet. Here's one at Totally Tots.
 |
| Here's one for sale on Amazon |
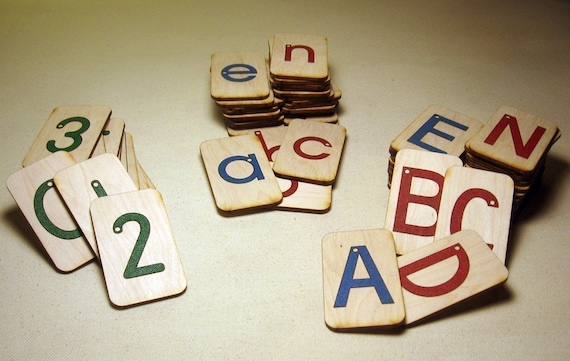 |
| We bought these from Etsy. |
 | ||
Here's Luke with Mat Man. Both L&L *love* singing the song and building him!
|
 |
| Luke's drawing (I did the "95" and the big and small lightning bolts for him, but he did everything else!) |
6. Do some type of writing/drawing every day. You can pretty much do this by planning some type of art or craft activity daily. It doesn't have to be anything really extravagant -- crayons and coloring books, plain paper and pencils, finger paint, sidewalk chalk and the driveway, etc.
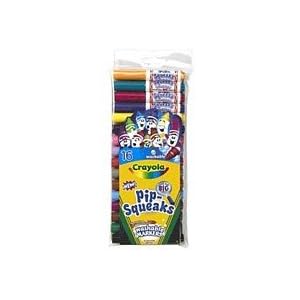
7. Use a variety of writing utensils to keep interest high: crayons, triangular crayons, markers, colored pencils, pencils, oil pastels, window crayons, dry erase markers, dry erase crayons, chalk, paint brushes, sidewalk chalk. Very short pieces are supposedly best for beginning writers. Crayola has a "pip squeaks" line of shorter-than-average markers and colored pencils which we like a lot.
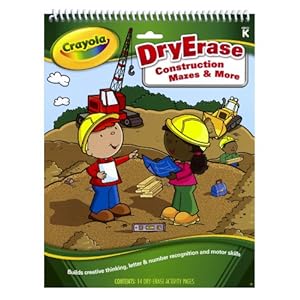
8. Mazes, Connect-the-dots, and tracing practices are great for beginning writers. Kumon has lots of great books! Luke also likes the Crayola Dry Erase Activity Tablet: Construction Mazes and More! We found it clearanced at Michael's for a little over $1. You can also save mazes and puzzles found in kids' magazines or print ones from online and put them into sheet protectors so they can be used over and over again with dry erase markers or crayons.
9. Print or neatly write your child's name in a "trace-me-style" dotted font. Laminate the page or put it into a plastic sheet protector. Have your child trace their name with a dry erase marker or crayon.
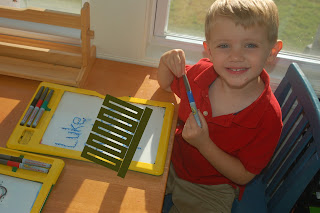 |
| I printed Luke's full name in a trace-me font and slipped it into his Crayola Dry Erase Activity Center. |
11. If your child likes cars, print these highway letter cards. Let your child practice "writing" their letters by driving cars on them.
 |
| from MakingLearningFun.com |
12. Make cards often: birthday, thank you, miss you, etc. Let your child help you decide what the card should say. Depending on their developmental level, you can have them copy what you write on a separate paper onto the card, trace over what you write lightly with pencil, or at the very least, write their name with you spelling aloud and guiding their hand.
 |
| Super Simple Valentine's Cards: post here |
14. Write stories with your child. Have them dictate and you write for them. These can be summaries of your day, a description of a dream they had, a story they make up using their toys or a picture, or something you concoct together. Modeling and writing for them shows them it's important and gives them experience with what the writing process is like. You can put their stories into a plastic folder with plastic sheet protectors so they can read them like a book. It'll be a great keepsake, too!
 |
| A story by Luke (Nov. 2011 -- age: 3 yrs. 9 months) |
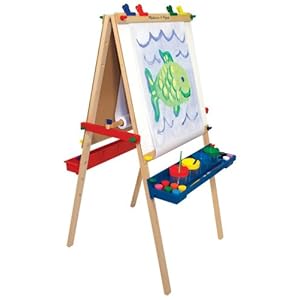
16. Write and draw on an easel. This is supposed to be REALLY good for pre- and beginning writers.
17. Write and draw on a variety of surfaces: various kinds of paper, easels, white boards, chalk boards, sidewalks, etc. You can even get creative and try writing/drawing on things like sandpaper, tinfoil, wax paper, and glass. :)
18. Write or draw on a Magna-Doodle, Aqua-Doodle, or Buddha Board.
 |
| Laptop Buddha Board |
20. Letter tracing and drawing apps for Android or Apple devices. There are lots and we've used some on both my Android phone and on the kids' iPod Touch devices. (We picked up 2 used iTouch devices on Craigslist for around $50/each just to use for educational apps for the kids. We also got a couple of stylus pens they can use with them.)
21. Practice drawing and writing in shaving cream. For easy clean-up, squirt the shaving cream onto a tray or large cookie sheet, but onto a table works, too.
22. Drive cars on letters using paint. Cut letters out of paper. Use cars dipped in paint to drive on the letters in the way you would write them. You could also do this just using letters, paint, and fingers if your child isn't into cars or as a variation. See Juggling with Kids' post here.
23. Build or make letters using various materials -- Wikki Stix, Play-Doh (homemade is usually easier to manipulate), Lego, buttons, Zoob, cereal, beads, wooden blocks, pretzel sticks, pipe cleaners, etc.
 |
| the letter "A" on a mosaic board (A is written in dry erase) |
24. Put paint, gel, or shaving cream into a plastic bag and seal it. Lay it on a table and put tape across the top to keep it from moving around. Let your child practice writing using their finger or a Q-tip to press into the bag. You can see this in action on the Let's Explore blog here.
25. Practice writing in the sandbox or on the beach. Use your finger, a shell, or a stick to write. Wet the sand if necessary.






No hay comentarios:
Publicar un comentario